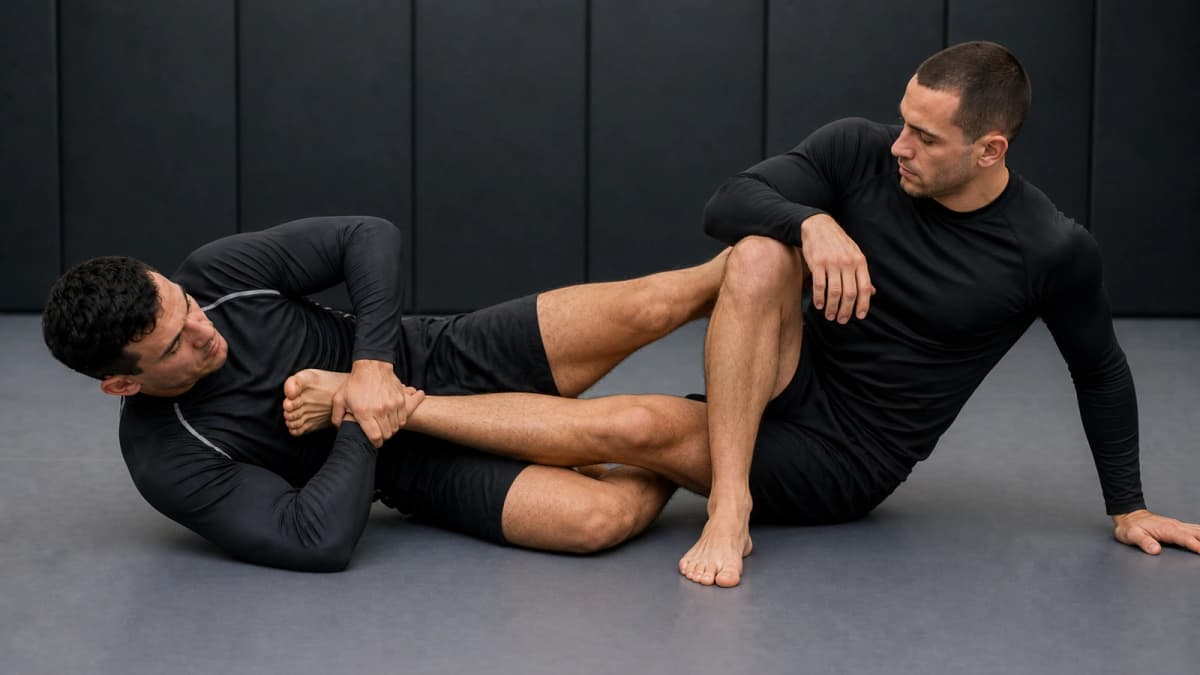
Ashi Garami
Primary leg-entanglement family that isolates one leg for heel hooks, kneebars, and transitions into saddle or 50/50.
Overview
Ashi garami is a foundational leg-entanglement family that isolates one leg so you can control the knee line and threaten heel hooks, kneebars, or transitions into saddle and fifty-fifty. Treat it as a control hub first — finishing mechanics come after the entanglement is stable.
Position Flow
How to Enter
- Enter from single-leg X or outside ashi when you win the hip race to one leg
- Recover ashi during open-guard scrambles when a standing opponent’s foot threads into your legs
- Transition from fifty-fifty when you clear to a clearer single-leg isolation
How to Exit
- Heel hook when competition rules permit
- Knee bar if the trapped leg straightens across your hips
- Straight ankle lock when heel control fails but the foot remains
- Saddle or fifty-fifty when you need a stronger inside or shared entanglement
Key Controls
- Figure-four or cross-ash configuration that pins the knee line
- Secondary control on the free leg or hips to stop stand-ups
- Upper-body posture that prevents stacks and heel exposures of your own
Vulnerabilities
- Opponent clearing the knee line before secondary control lands
- Stack pressure that folds you toward your shoulders
- Your own exposed heel if you invert without connection
Ideal When
You need a single-leg entanglement hub that connects outside ashi, saddle, and legal or ruleset-specific finishes.
OffenseOffense
Goals
- Pin the knee line before hunting the heel
- Force a defensive turn that opens a finish or a better entanglement
Key Techniques
- Outside heel hook or inside heel hook depending on configuration and rules
- Knee bar on a straightened leg
- Ankle lock when the heel hides
- Transition to saddle for stronger inside control
Pro Tips
- Knee line first — heel second
- Hide your free leg; ashi wars cut both ways
Common Mistakes
- Twisting for a heel hook with a soft knee line
- Inverting without hip connection under their weight
DefenseDefense
Goals
- Clear the knee line and hide the heel
- Stand or stack before rotational pressure starts
Key Techniques
- Inside knee pummel to break the ashi figure-four
- Heel hide and hand fight on finishing grips
- Technical stand-up or stack when the entanglement is shallow
Pro Tips
- Address the knee line early; late peels happen under heel-hook pressure
- Know your ruleset — IBJJF restrictions change which escapes and counters are legal
Common Mistakes
- Turning the wrong way into a tighter heel hook
- Both hands fighting the finish while the entanglement stays locked
Variations
Outside ashi configurationsInside ashi entries toward saddleAshi-to-fifty-fifty transitionsAshi-to-knee-bar when the leg straightens
Key Concepts
- Ashi is a family of controls, not one rigid finish
- Stable knee-line control decides whether finishes are safe and high percentage
- Ruleset awareness matters as much as mechanics for heel-hook branches
Recommended Drills
- Entry-to-stabilize rounds from SLX and outside ashi
- Knee-line retention under progressive stand-up resistance
- Legal-finish positional rounds that emphasize control before rotation
Related Techniques
Summary
Ashi garami isolates one leg so you can control the knee line and choose heel hooks, kneebars, ankle locks, or transitions into saddle and fifty-fifty. Stabilize first, finish second, and respect ruleset limits.