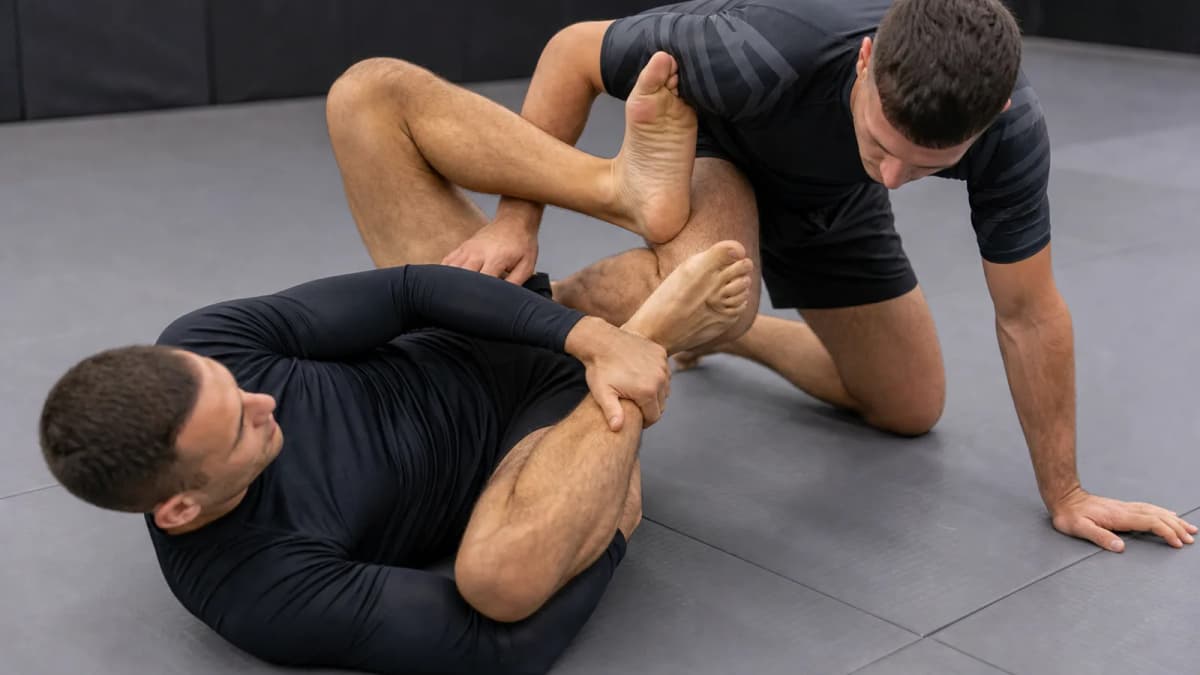
Single-Leg X
Ashi-style open guard that isolates one leg with a figure-four — the main highway into ankle locks and modern heel hooks.
Overview
Single-leg X (SLX) wraps one of the opponent’s legs in a figure-four while your hips stay under their base. It is one of the most important modern open-guard structures because it creates sweeps, stand-up entries, and high-percentage paths into straight ankle locks and heel hooks.
Position Flow
How to Enter
- Transition from X-guard by releasing the far hook and tightening the near figure-four
- Enter from seated open guard when you catch a stepping lead leg
- Recover from half guard or scramble positions by inserting the outside hook first
How to Exit
- Straight ankle lock when the foot is controlled and hips are aligned
- Heel hook entries when rules allow and the heel is exposed
- Technical stand-up sweep to come up on the single leg
- Fifty-fifty when they turn and both legs entangle
Key Controls
- Figure-four on the trapped leg with your outside foot on their hip or rib line
- Inside knee/shin connection that keeps their knee from escaping outside
- Hand fight on the free leg, sleeve, or ankle to stop them clearing the entanglement
Vulnerabilities
- Opponent knees down and smash-passes before the figure-four locks
- Backstep clears that free the trapped knee
- Your own exposed heel if secondary control is lazy
Ideal When
You want a tight single-leg entanglement that connects open-guard retention to leg-lock offense.
OffenseOffense
Goals
- Pin the knee line and own the foot before they plant
- Force a choice between giving the sweep and defending the leg attack
Key Techniques
- Straight ankle lock from classic ashi alignment
- Inside/outside heel hook when competition rules permit
- Stand-up to single-leg takedown finish off broken base
Pro Tips
- Hide your own free leg; SLX fails when the passer attacks your exposed heel first
- Elevate or off-balance before finishing — static SLX against a heavy base stalls
Common Mistakes
- Crossing feet without hip connection under their weight
- Hunting heel hooks before knee-line control is real
DefenseDefense
Goals
- Clear the outside hook and put a knee on the mat
- Keep the trapped foot from being cupped for ankle locks
Key Techniques
- Knee-down base with posture to kill elevation
- Backstep or long-step to free the trapped knee
- Hand fight to hide the heel and peel figure-four control
Pro Tips
- Address the hip hook early; late reactions feed the ankle lock
- Do not hop on one foot over a locked SLX
Variations
Standard single-leg X under a standing opponentSLX to fifty-fifty when they turn inboundOutside ashi variations that change heel-hook direction
Key Concepts
- SLX is control of one leg plus your own safety on the other
- Knee line first, foot second, finish third
- Sweeps and submissions should threaten together
Recommended Drills
- Open-guard to SLX entry reps with cooperative stepping
- Ankle-lock alignment drills from a static SLX hold
- SLX retention rounds where the passer only tries to knee-down and clear
Related Techniques
Summary
Single-leg X isolates one leg, elevates their base, and opens a short menu of finishes. Lock the figure-four, protect your free leg, then choose sweep or leg attack based on how they defend the foot.