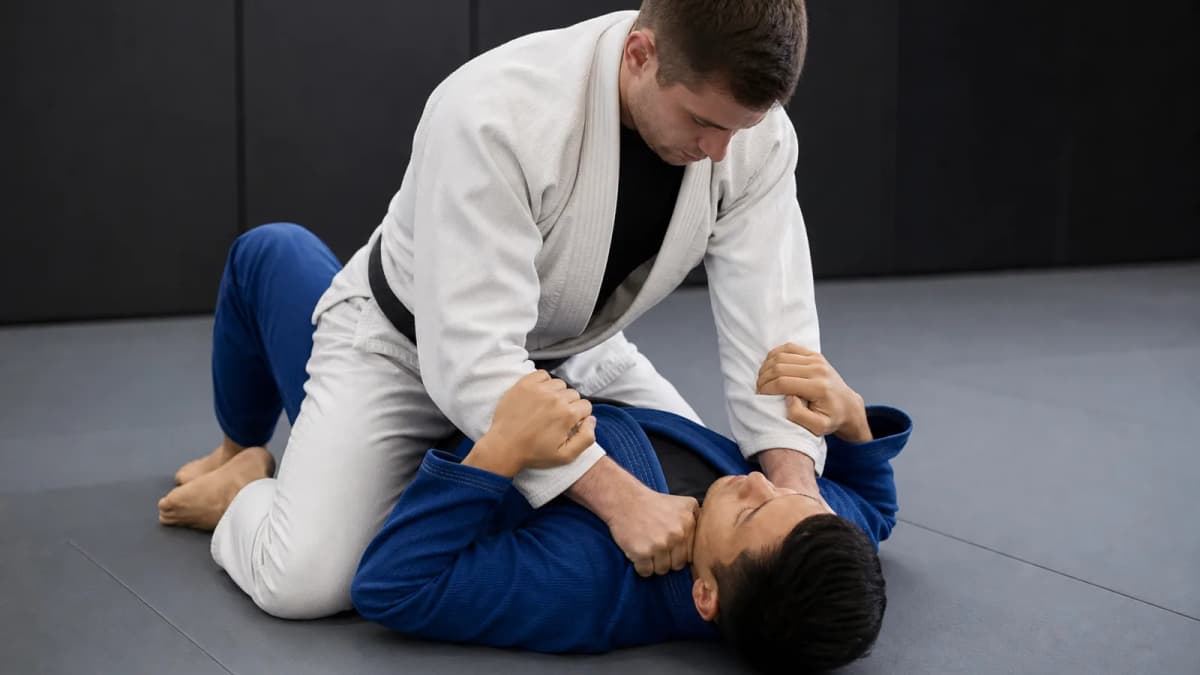
Mount
The most dominant top position in BJJ with strong control and finishing options.
Overview
Mount is for pinning hips and shoulders so high-percentage finishes become available without handing over an easy escape. Retention comes first: keep weight honest, deny frames, climb or switch to technical mount when they turn, then attack. Read the mount retention guide if you need a progression order.
Position Flow
How to Enter
- Complete guard passes (knee cut, torreando) and step directly to mount
- Transition from side control via knee slide or windshield-wiper mount
- Capitalize on sweeps by climbing immediately from top half guard to mount
- Backstep from half guard when the opponent is fighting for the underhook
How to Exit
- Slide into technical mount when the opponent turns to a hip
- Drop to knee-on-belly to chase reactions and reset grips
- Switch to back control when shoulders expose the neck
- Enter mounted triangle or armbar chains as defenses collapse
Key Controls
- Anchor hips heavy with knees pinched to limit bridging power
- Control head and arm to restrict shrimping and frame recovery
- Climb toward high mount to isolate the shoulders and arms
- Use grapevine hooks or S-mount transitions when space opens
Vulnerabilities
- Bridge-and-roll escapes if hands post too high or wide
- Elbow-knee recoveries when knees are not pinched or feet cross
- Underhook recoveries to half guard if chest pressure lightens
- Leg entanglements when feet dangle near the opponent’s hips
Ideal When
You have stabilized after a guard pass and want sustained pressure that survives the first bridge before you hunt finishes.
OffenseOffense
Goals
- Maintain hip and chest pressure that survives bridges
- Remove frames before isolating an arm or head-and-arm connection
Key Techniques
- Americana to straight armbar progression
- Cross-collar choke (gi) or low palm choke (no-gi)
- Technical mount to back take when they turn
- Mounted triangle and S-mount transitions
Pro Tips
- Climb higher on the torso as soon as elbows flare
- Hide posting hands to avoid bridge-and-roll counters
- Treat technical mount as the default upgrade when they turn to a hip
Common Mistakes
- Reaching for arms before the hips are controlled
- Leaning forward and giving space for underhooks
- Crossing feet behind the opponent’s hips
DefenseDefense
Goals
- Break the top player’s posture before attempting escapes
- Create hip movement to recover half guard or closed guard
Key Techniques
- Trap-and-roll (upa) escape when a post is exposed
- Elbow-knee (shrimp) escape back to half guard or closed guard
Pro Tips
- Frame across hips to keep them high before initiating escapes
- Time bridges with grip breaks to remove posts
Common Mistakes
- Pushing straight up with arms, exposing armbars
- Bridging without trapping an arm or leg
Variations
Low mount with grapevinesHigh mount focused on arm isolationTechnical mount for back takes and armbarsS-mount for tight arm and triangle attacks
Related Techniques
Summary
Mount rewards patient hip control: deny frames, climb or switch as they turn, and layer submission chains only after the pin survives the first escape. Start with the mount retention guide if you need a progression order.