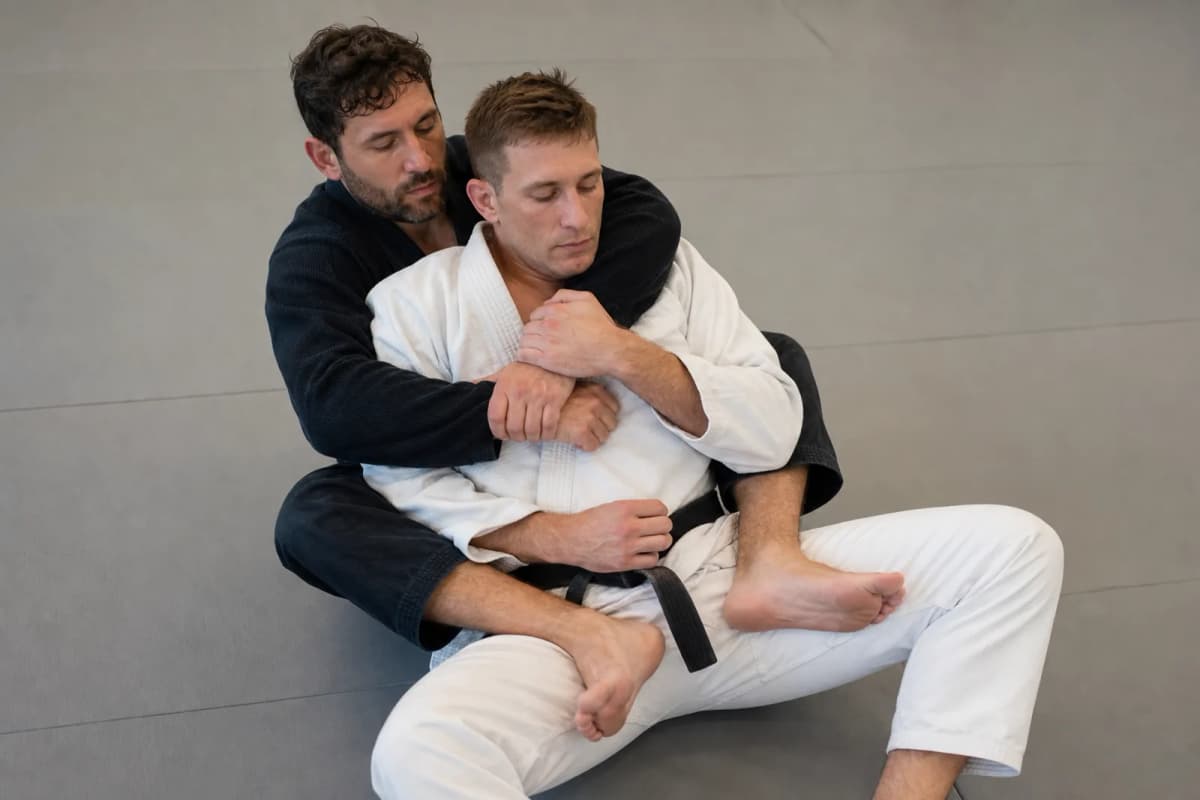
Back Control
Highest scoring control position with strong finishing mechanics.
Back control is for finishing from the highest-percentage seat in BJJ. Win the seatbelt and hip control first, then funnel hand-fights into a short list of chokes. Hooks or a body triangle keep the position honest; the choke is the ending, not the starting point. Read the back-control finishing system if you need a progression order.
How to Enter
- Take the back from mount or side control when the opponent turns to escape
- Transition off failed guard passes by forcing turtle and inserting hooks
- Climb to the back from closed guard armbar and triangle chains
- Secure seatbelt during scrambles and jump hooks while staying glued to the torso
How to Exit
- Switch to mount when defenses overcommit to hand fighting
- Transition to armbar when the opponent peels the choking arm incorrectly
- Flow to seatbelt-on-top position after a successful choke attempt
- Climb into a triangle finish when the opponent exposes a leg
Key Controls
- Seatbelt (over-under) grip with chest-to-back pressure
- Dual hooks or body triangle to immobilize the hips
- Foot hooks pinched inside thighs to prevent hip escape
- Head alignment next to the opponent’s head to keep shoulders pinned
Vulnerabilities
- Two-on-one hand fighting that peels the choking hand free
- Escapes toward the hookless side if chest pressure loosens
- Reverse body lock escapes when body triangle pressure fades
- Leg traps that attack the top player’s hooks during rolls
Ideal When
You want the highest control and submission percentage—especially to finish matches without giving up dominant position.
Goals
- Maintain chest-to-back pressure while controlling head and hips
- Force defensive reactions that uncover the neck or arms
Key Techniques
- Rear naked choke and short choke variations
- Sliding lapel choke and bow-and-arrow (gi)
- Straightjacket system trapping arms before finishing
- Armbar transitions off failed choke attempts
Pro Tips
- Switch grip orientation (over-under to double-under) as reactions dictate
- Climb to high back with hooks under the thighs, or lock a body triangle — do not cross feet in front of the hips
Common Mistakes
- Crossing feet loosely in front of the opponent’s hips
- Leaning too far to one side, giving the escape path toward the floor
Goals
- Control the choking arm immediately with two hands
- Slide shoulders and head to the mat to eliminate chest-to-back pressure
Key Techniques
- Two-on-one hand fight followed by escape to the hookless side
- Shoulder scrape to turtle then peek-out reversal
Pro Tips
- Keep chin tucked and shoulders shrugged to shield the neck
- Address seatbelt control before attempting to clear hooks
Common Mistakes
- Trying to pry hooks with hands before controlling the choke grip
- Rolling belly-down without establishing wrist control first
- Keep your head tight beside the opponent's to prevent shoulder slipping
- Hide the choking-arm hand to obstruct defensive grips
- Engage hooks actively—heels in, knees tight—to prevent hip escapes
- Adjust chest angle constantly to follow bridges and rolls
- Seatbelt retention rounds focusing on staying glued during escapes
- Hand-fighting sparring to secure rear naked choke under pressure
- Body triangle maintenance drills tracking hip movement
Back control is the finishing platform: lock seatbelt, clamp hooks or body triangle, win the hand fight, and funnel defenses into high-percentage choke and arm attacks. Start with the finishing-system guide if you need a short progression order.