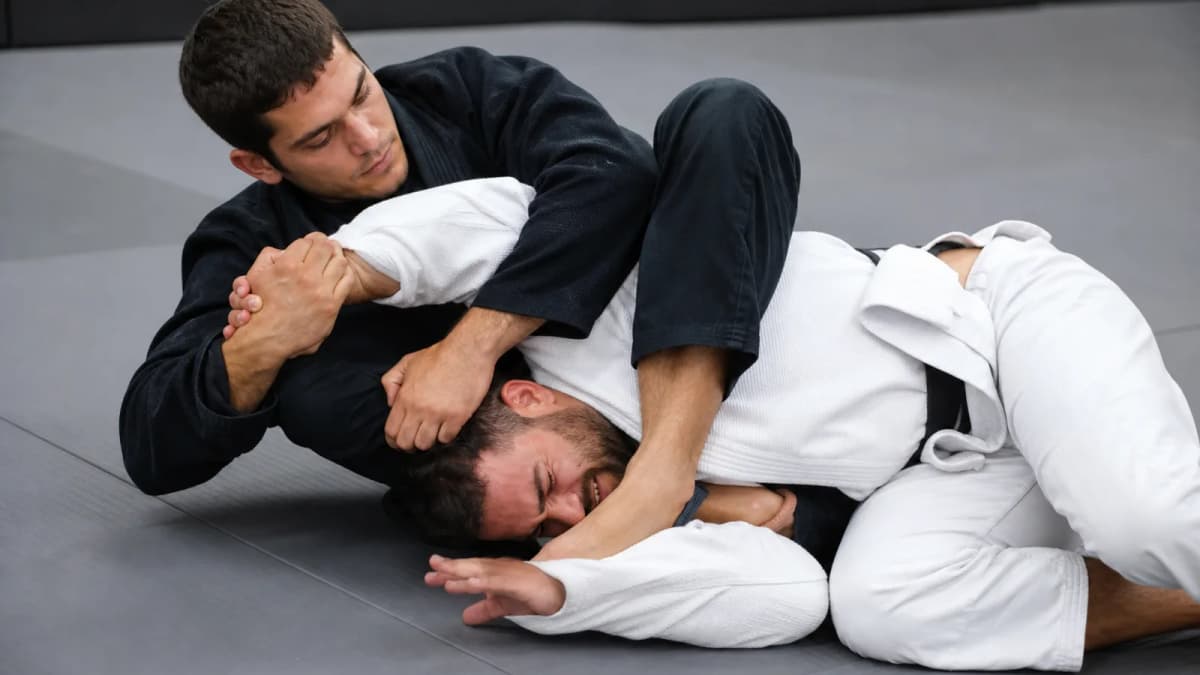
Kimura
Figure-four shoulder lock that controls the arm from guard, side control, and north-south — a staple sweep and submission.
shoulder lock
Overview
The kimura uses a figure-four grip on the wrist to rotate the shoulder. It connects naturally to hip-bump sweeps from closed guard, back takes when the opponent rolls, and finishes from side control and north-south.
#Setup
- Control the wrist and elbow on one side — often after a hip bump or when the opponent posts.
- Thread your far hand over the wrist and grab your own wrist to form the figure-four.
- Pin the elbow to your body and remove slack before applying rotation.
#Execution
- Lift the elbow while driving the wrist toward the opponent’s spine.
- Walk your hips toward their head in side control to increase leverage.
- Apply pressure gradually along the shoulder line, not by yanking the wrist.
#Finishing
- Keep the elbow pinned — floating elbows escape easily.
- Switch to a top kimura when they roll; follow with a gift wrap or back take.
⚠️
Safety Note
Kimura stresses the shoulder and can load the elbow. Apply slow rotation along the shoulder line and never yank the wrist explosively when the elbow is pinned.
Primary Targets
- Shoulder
- Elbow
Key Concepts
- Figure-four grip first, rotation second.
- Hip bump creates the posting arm that feeds the kimura.
- The kimura is a positional tool as much as a submission.
Primary Entries
- Hip-bump sweep when the opponent posts a hand on the mat.
- Side control when they frame on your hip with a straight arm.
- Failed armbar when you retain wrist control during the scramble.
Defenses & Counters
- Expect them to straighten the arm or clasp hands — keep the elbow glued to your body before rotating.
- Watch for rolls that clear the figure-four; follow the wrist or switch to the back.
- If they stack from guard, elevate and threaten the sweep rather than forcing the finish flat.
Follow-Ups
- Back take when they roll away from the shoulder pressure.
- Armbar if they straighten the arm to defend the figure-four.
- North-south kimura finish after passing with the grip intact.
- Back take when the opponent rolls away from kimura pressure.
- Armbar when they straighten the arm to defend.
- North-south finish after passing with the grip intact.
Training Drills
- Hip-bump to kimura chain from closed guard.
- Side control kimura walk with progressive shoulder pressure.
- Roll-through back take when partner defends the lock.
Related Techniques
Deepen your study with complementary positions and attacks.
Summary
Learn the kimura as grip-fighting infrastructure. It sweeps, submits, and opens back takes from the most common white-belt scrambles.